
The Pocket Loom has been one of my most involved and complex designs so far. It’s a series of looms in multiple sizes and setts to suit a variety of needs.
My idea for the loom kit came about while I was helping the Carmel Crafts Guild prepare for the upcoming county fair. My guild tries to have a few different give-away kits for kids and curious grown-ups, and I saw an easy way to improve what we were offering.
What started out as a thought experiment turned into one of my most popular products yet. Demand for my Pocket Loom kits led me to develop more setts and sizes, and they get consistent 5-star reviews. I’ve shipped kits all over the world, and they’re a very popular holiday gift with parents looking to reduce their kids’ screen time.

The initial idea

The cardboard looms my guild make available each year at the county fair are always a hit, especially with kids. They love the easy, free, hands-on activity, and it takes minimal instruction before they’re off to the weaving races. With each kit, we give them a popsicle stick “shuttle” wrapped with enough yarn to do about ten rows of weaving.
The main downside to these looms is that the cardboard easily bends, breaks, or tears. The slots for the warp wear out quickly, and are easily damaged if the loom is dropped. Most people can get one or two weavings out of the loom before it’s too worn out to use, three or four finished pieces if they’re very gentle with it.
I wanted to develop something that was more robust, and just a easy and fun to use. Naturally, I turned to 3D printing.
First prototype


My first prototype was pretty simple: a square frame, notches for the yarn, and a raised beam next to each row of notches. I made the frame hollow to save on material, and printed the first test piece.
I warped the loom with some yellow crochet cotton thread and used some scrap cotton yarn from my stash to do a simple 1/1 plain weave test. My next swatch was a 2/2 twill, over 2 and under 2 with each row offset for a diagonal pattern. I used a long weaving needle for this, individually picking over and under each thread for each row.
While this duplicated and replaced the original cardboard loom, I knew I could make it better.
Second prototype
I was idly browsing product listings online to see what was available for other small looms as a way to get some inspiration. When I stumbled on this particular listing on Amazon, it definitely got the gears turning.
I’d run into a few issues with my first prototype that this other design solves. First, I didn’t have a way to pack new rows down against previous ones. Second, I found it to be pretty tedious to manually pick each thread up or down while weaving.
The bar across the middle of the loom is a roller that rocks back and forth, with alternating slots to raise or lower each warp thread. This allows for an easy way to change the shed: switch which set of warp threads is up or down.
I didn’t think that a shuttle would work for my design, though, since the loom itself is so small. For larger looms it would, but my design makes finished pieces about the size of a coaster for a coffee mug.


My second prototype had several changes, inspired by the loom I found on Amazon:
- A beater comb, to pack each new row into place
- A heddle roller for raising and lowering each set of warp threads
- A needle that matches the material of the loom
- Wider sides on the loom frame to make it easier and more comfortable to hold
I took several prints of my second prototype design to my weekly Small Looms weaving group and gave them to interested weavers. The feedback I got was very useful, and helped me take the design to the next stage.
Third prototype
The weavers at my weekly group said the frame of the loom was fine, but other points could be improved:
- A wider handle on the beater comb, to make it easier to use
- The heddle roller should be the full width of the loom, and have little cups on each “up” section to keep the thread in place
- Alignment caps on either end of the heddle roller to keep it centered on the loom
- A narrower point for the needle
I also added a shallow notch on the needle to help with placing the weft on each row. If you pull the weft straight across, it’ll get too tight and the sides of the weaving will draw inward as you weave. The notch acts as a guide for making a triangle, with the weft going up at an angle. This allows the weft to be more relaxed as it’s packed down with the comb, which keeps the weaving more straight and flat.
I did another test swatch with the new heddle roller, and I’m very pleased with how it came out. It took me less than half the time it took to do the first swatch, and was much easier.

Fourth prototype
The Pocket Loom’s design stayed mostly the same for the next prototype, with some minor changes:
- The needle only tapers in one axis now, not two; it’s more like a simple wedge instead of a tapered chisel
- I made the alignment caps on the heddle roller wider to work as handles
- Bumps on each side of the loom to keep the heddle roller in place next to the beams
- Notches in the frame to capture the ends of the warp thread
By this point, I was pretty close to my final design. I did a few more test swatches, and made a few more design tweaks:
- Diagonal cross-bracing inside the frame to keep the frame from flexing under tension
- Different placement for the V notches on either side of the loom

First release


The first model I released is the 8-dent version of the loom, which allows for 8 warp threads per inch. It quickly became one of my best sellers, and I had enough requests for a 10-dent version that I designed that too:
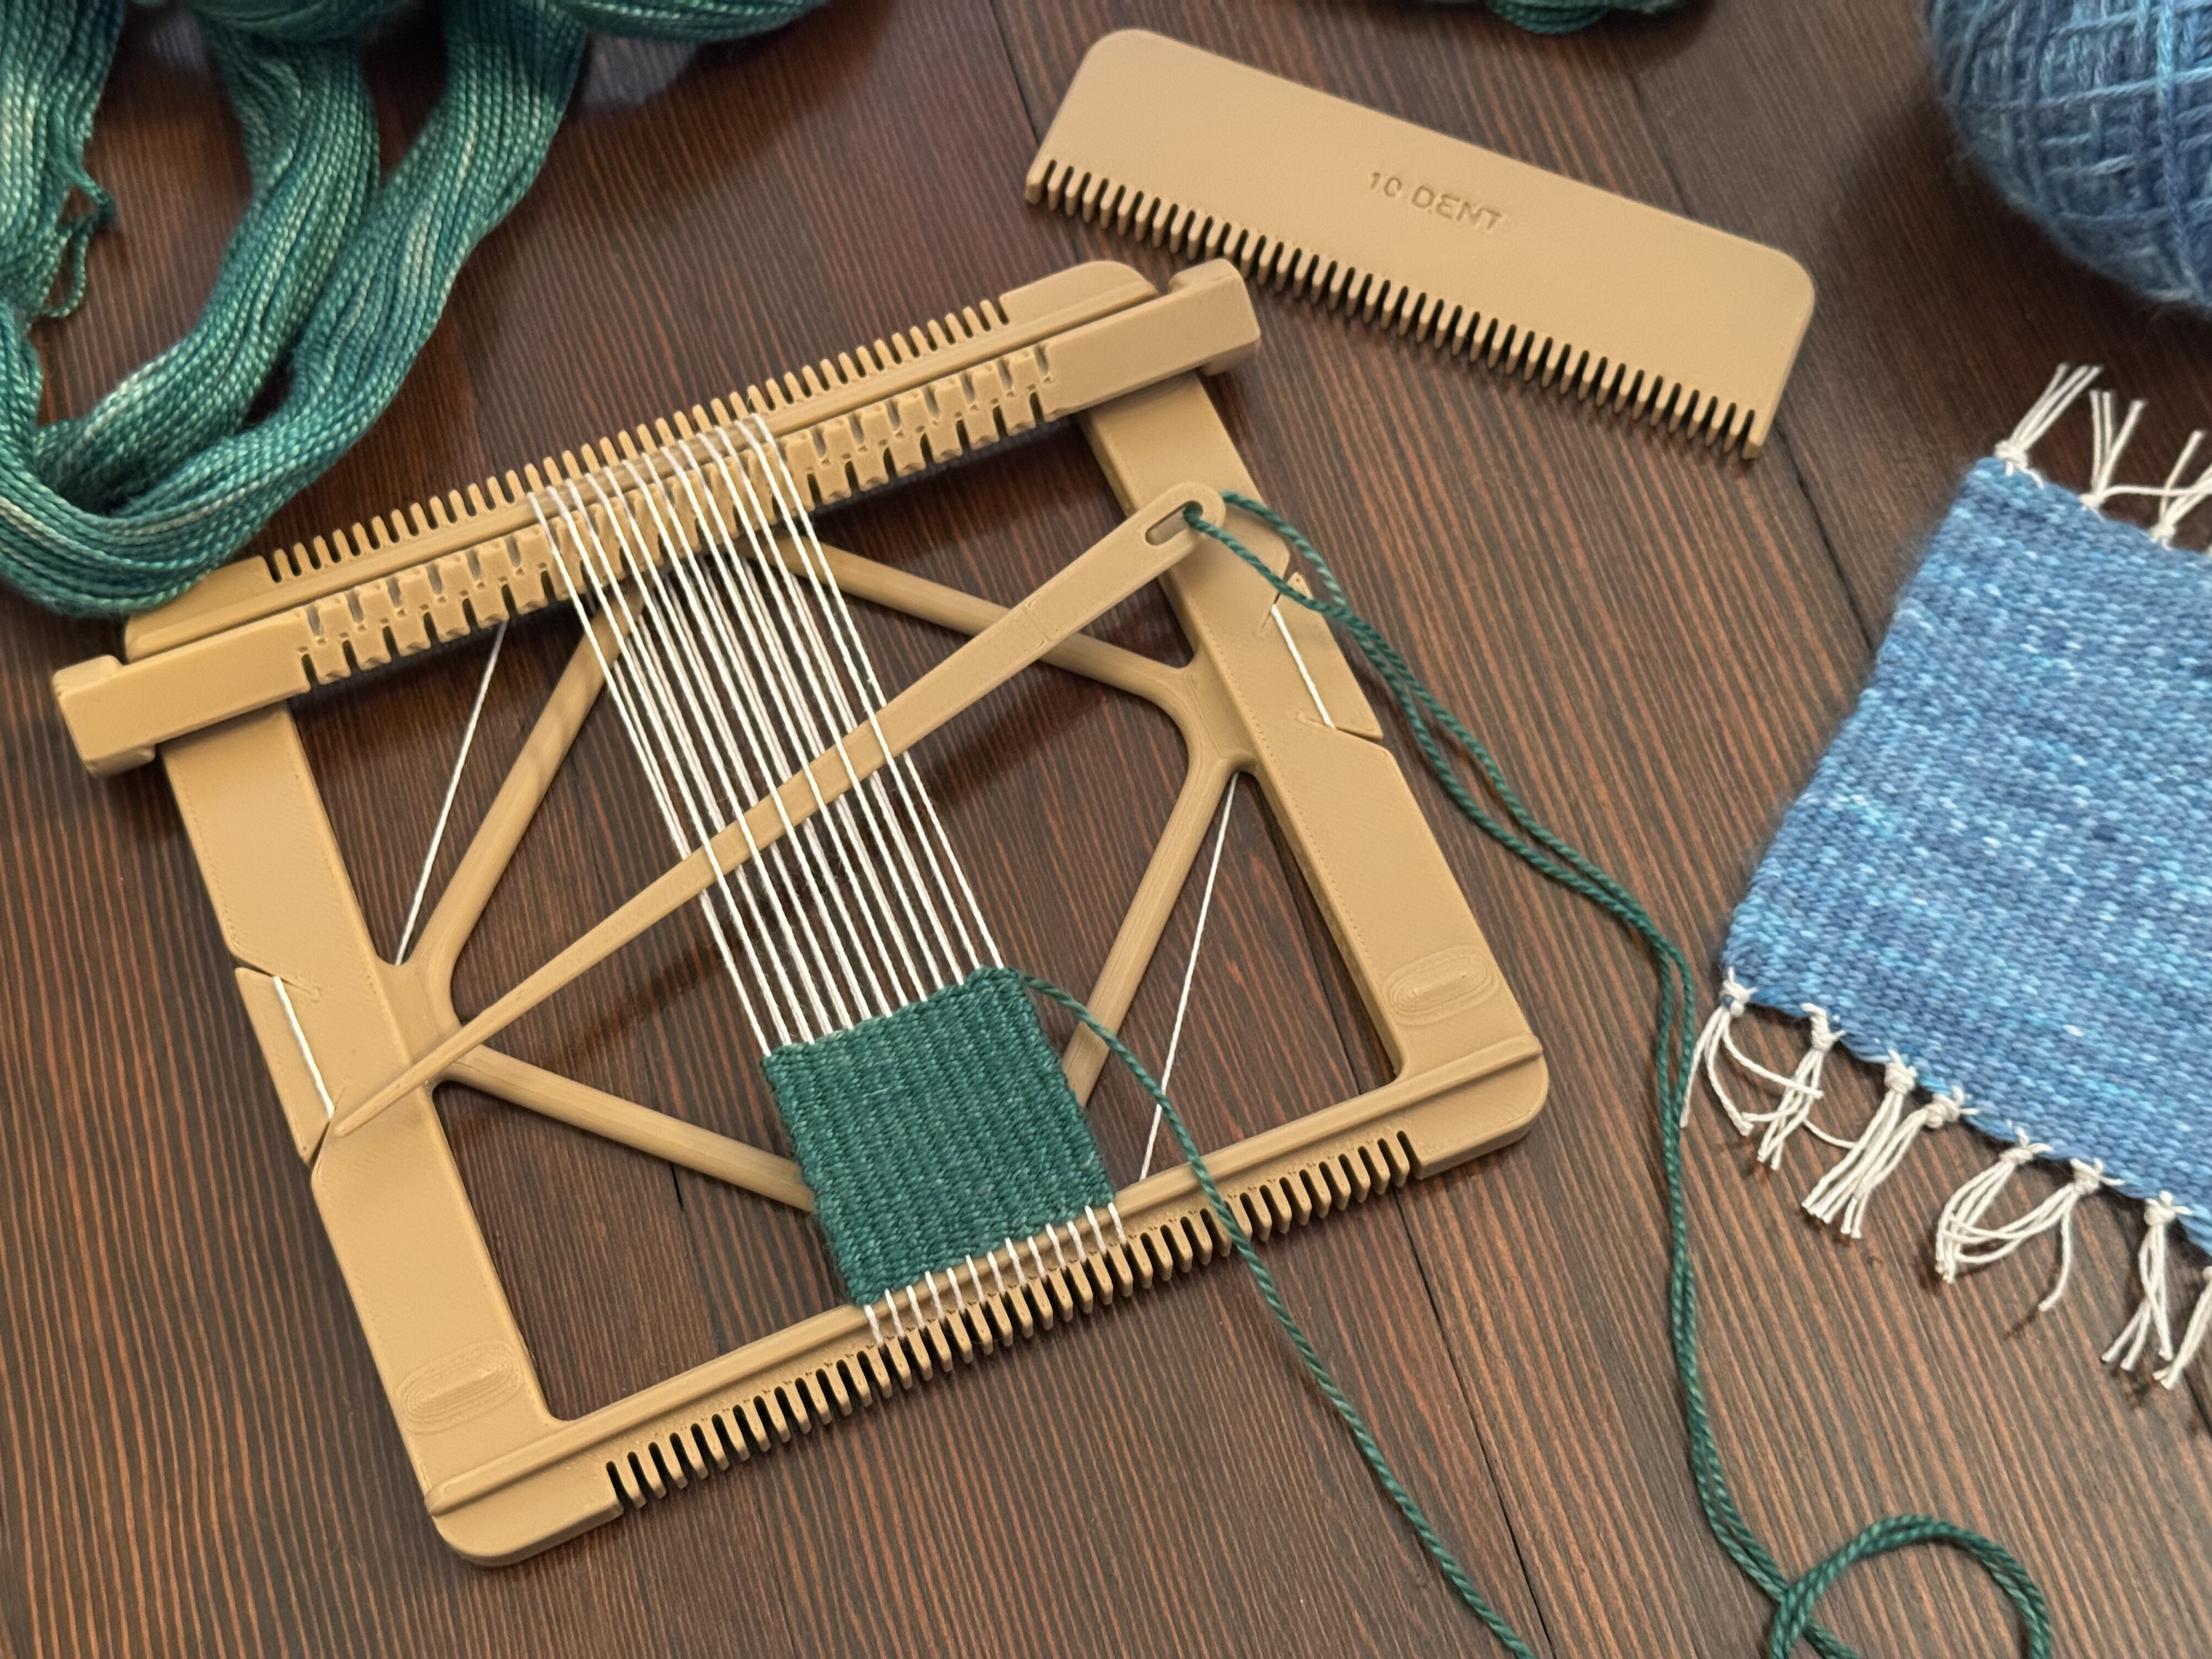

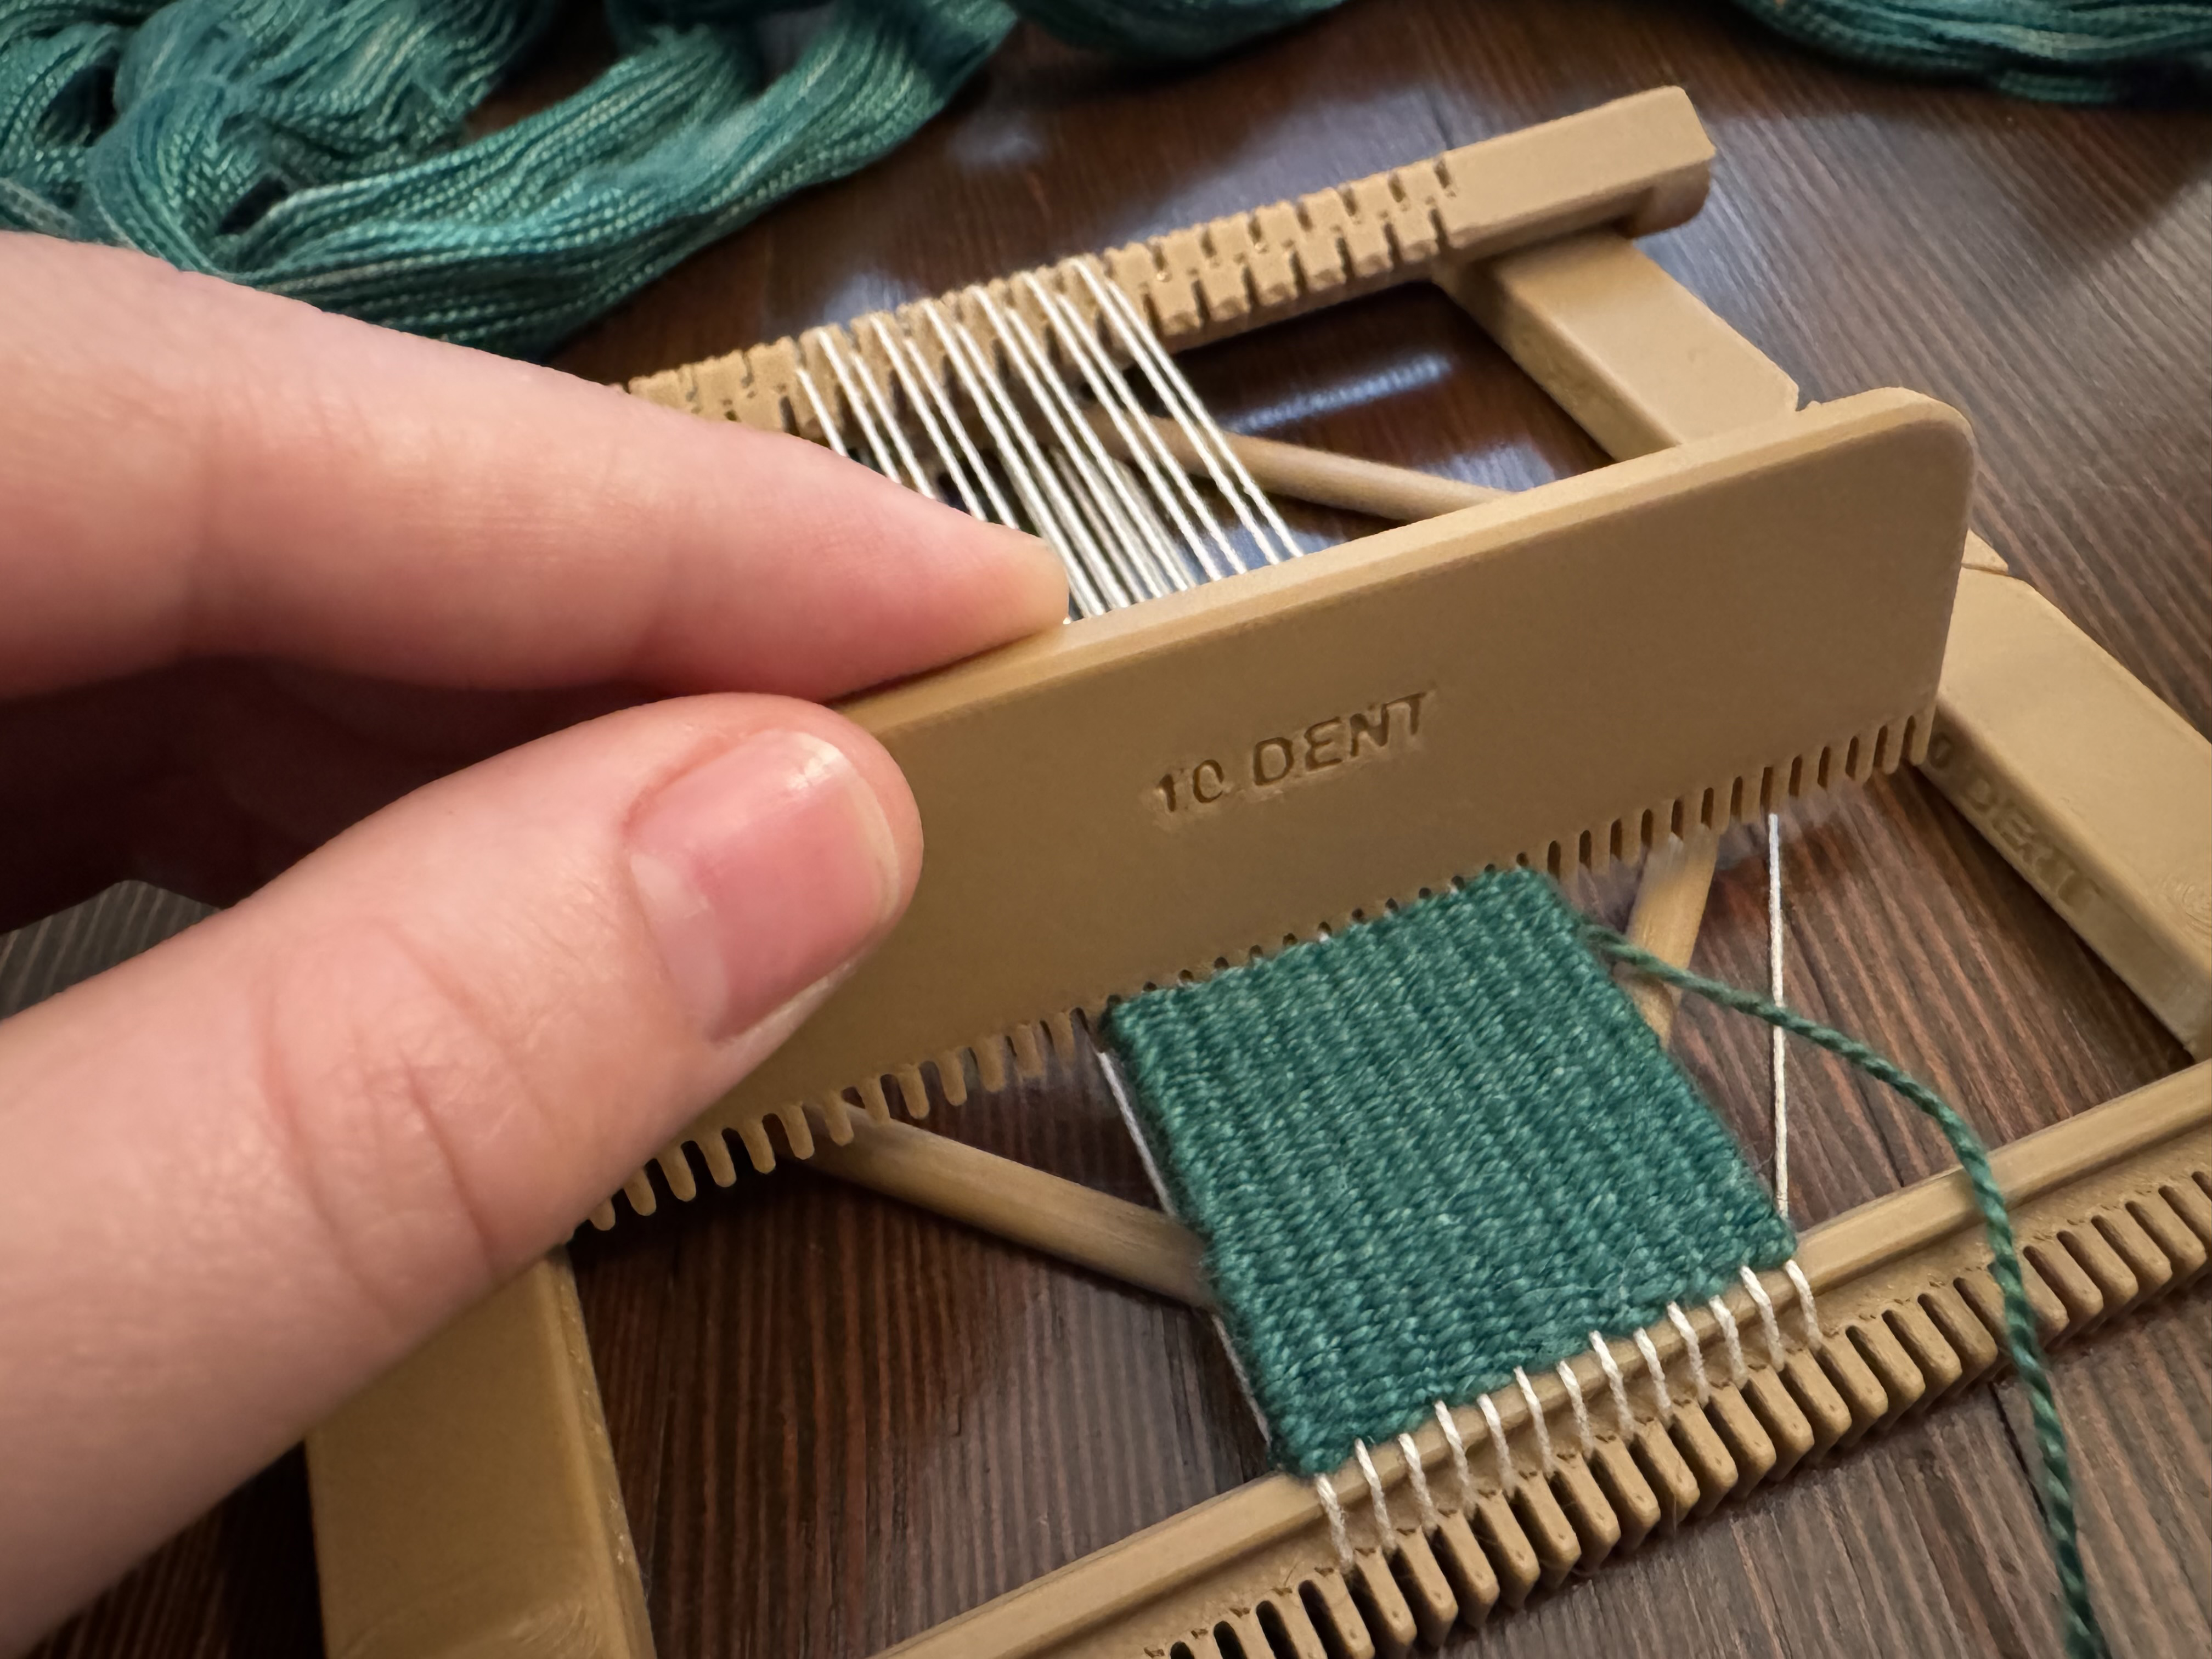
I figured out after a few weeks that I’d made a bit of a math error, though… my looms weren’t actually properly 8-dent or 10-dent. I fixed the dent spacing (oops) and updated my 3D printing files for all new orders.
More options
Several requests came in for more options, specifically a larger working size and a 12-dent sett. Both proved to be interesting challenges, and I worked on them concurrently.
12-dent
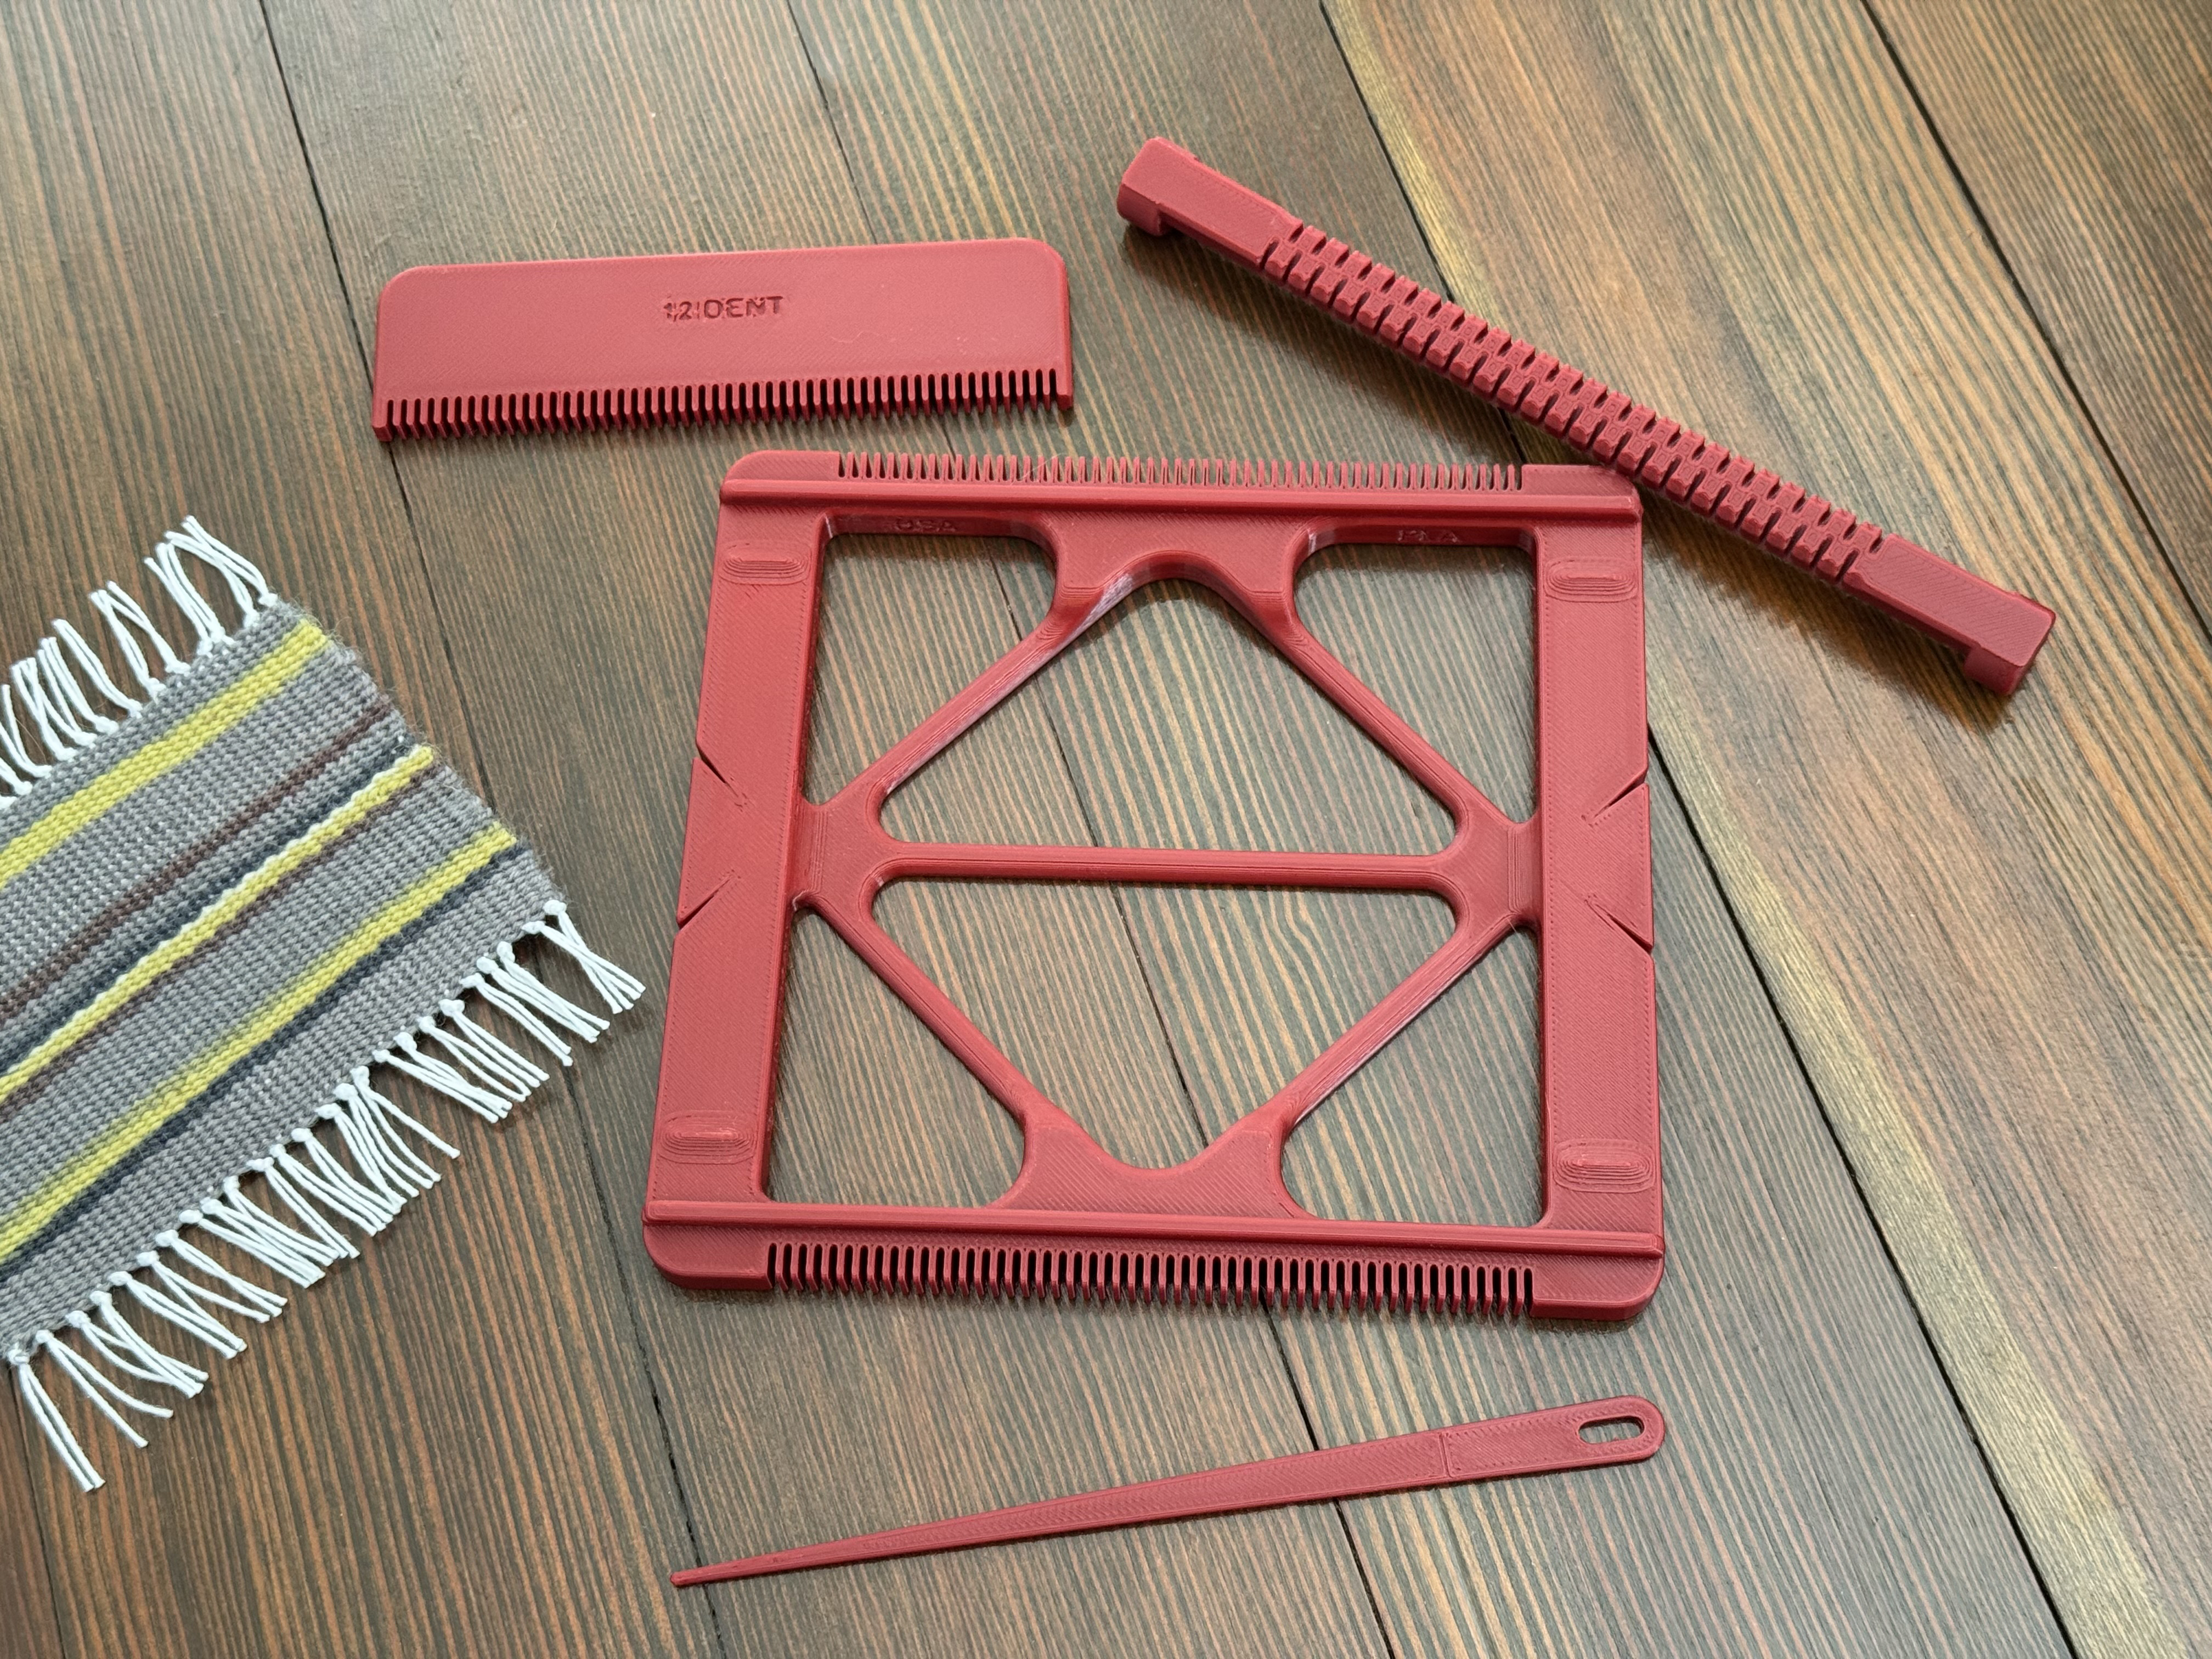
I was a bit reluctant to try a 12-dent loom, admittedly. I wasn’t sure if the plastic would be sturdy enough to have dents that close together. The dents themselves are a bit narrower than they are on the 8-dent and 10-dent versions, to allow for just a little bit more material on each tooth. It turned out to be fine, though, at least as long as nobody actively tries to bend the teeth.
I also added a horizontal cross brace to the loom frame. I’d noticed that high warp tension was causing the front and back of the loom to pull inward and the sides to buckle outward, even with the diamond brace inside. I wasn’t sure whether to make the additional brace horizontal or vertical, so I just tried horizontal first to see what would happen.
Once I had the first test print done, I squeezed the loom’s sides together with my hands to see how it flexed with the new brace. The horizontal brace proved to be the right one to go with; if I pressed inward on the sides as if the brace were vertical, the brace bent upwards in the middle. With the horizontal brace, it’s under tension instead of compression, so it resists stretching and therefore makes the loom more rigid.

7″ x 7″


I also worked on a scaled-up version of the loom, this one with a 7″ x 7″ maximum working size. I wasn’t sure exactly how the larger size would be affected, but I knew I was running up against the limits of what PLA plastic can do. When in doubt, though, just test it… so I modified my 4″ files into a 7″ kit and ran a test print.
Overall, the design was mostly there. But I quickly noticed a few issues after warping it up for the first test:
- The tension on the loom frame was enough to distort the loom in two directions: flexing upward along the Y axis, and downward along the X axis
- The heddle roller didn’t provide a tall enough shed to easily get a weaving needle through
I went back to the drawing board, and made a few more changes:


I made the frame much thicker so that it’s more robust, and also increased the infill percentage in my 3D printing software to increase the density of the 3D print. The heddle roller is larger as well, giving more space between the upper and lower threads in the shed.
When creating the design for the shuttle, I remembered one of the weavers in my weekly group mentioning that she likes one of her shuttles that has ruler markings on it. I chose to add both inches and centimeters, one on either side of the shuttle.
Dealing with heddle roller flexion
One of the last modifications I made to my loom designs before releasing the 12-dent and 7″ versions was adding a support bar for the heddle roller. I noticed that the rollers were flexing when under tension, especially on the larger loom. Increasing the infill density while 3D printing helped somewhat, but didn’t completely fix it.
I extended the diagonal bracing upwards to the upper surface of the loom to create a block under the center of the heddle roller. When I tested this with the 7″ loom prototype, it was effective enough that I added it to my smaller looms as well.
With this design update, I redid all of the print files for my various loom models again, and published the 12-dent and 7″ looms.

Tweaking the design for the comb
I noticed that some colors of filament (likely dependent on their pigment blends) had issues with the comb. Specifically, over-extrusion was causing buildup of plastic on the nozzle and creating a rough texture on either side of the top layer of the comb.
There are a few ways to solve this: you can either modify your printing settings, or modify your 3D model. Since I was only seeing this issue on some colors but not others, I chose to modify the 3D model in such a way that it minimized the over-extrusion buildup.
I added indentations on either end where the over-extrusion was occurring. This helps the printer blend in the excess plastic much more easily, while also giving the weaver a more comfortable grip on the comb.

Final product: 12-dent


Final product: 7″ x 7″


The perfect mini loom
I’m very happy with the loom design I have, and the number of sales I’ve made speak to the quality of it as well. Weavers of all skill levels love them, from complete beginners to experienced weavers.
Beginners use the looms as the perfect, inexpensive way to try out weaving. At $30 per kit for the 4″x4″ size, they’re well within most budgets and are much more affordable than the $300 or more it takes to get a good quality rigid heddle table loom. It comes with everything but the yarn, and even includes step by step instructions.
Experienced weavers use the Pocket Loom to create sample swatches to try out colors and patterns. It’s much quicker to do several 4″x4″ swatches than to spend days setting up a large floor loom just to change your mind.
Another perfect use case is making patches for mending clothes. Weave a durable, colorful patch, then sew it over a hole. The 7″ looms are the ideal size for making knee patches for jeans.
